
Restoration of kitchen facades: how to update the countertop with your own hands, repairing old furniture and a set of wood, how to paste over an MDF kitchen
When a new kitchen set is too expensive, it is not necessary to sit and sigh, looking at a peeling countertop or worn backs of chairs. A little effort – and the restoration of kitchen furniture with your own hands will breathe new life into it.
Restoration of a kitchen set
Of course, the replacement of functional elements of furniture (panels, aprons, countertops, etc.) can only be done by professionals. But lighter types of restoration work are available to any home master. These include:
- replacement and restoration of accessories;
- attaching a self-adhesive film;
- staining;
- varnishing;
- fabric trim;
- seat upholstery;
- gluing tiles.
accessories
First of all, the replacement of the following elements is needed to restore the functionality of the furniture, but at the same time, a minimal update of its appearance is also ensured:
- loops;
- guides;
- pens.
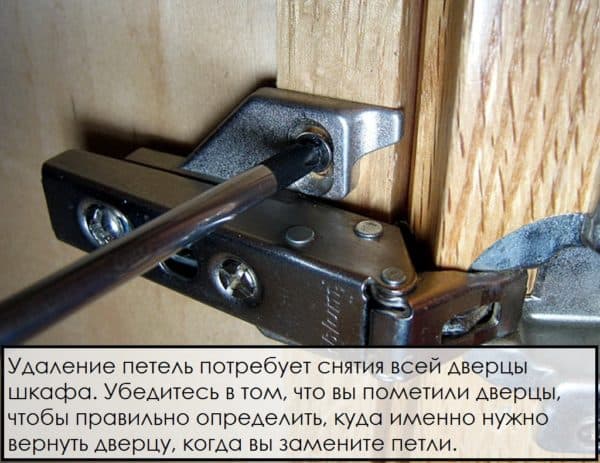
Replacing and relocating door hinges
A common problem is that the hinges are still in working order, but the places where they are connected to the facade elements for the kitchen are loose or pieces are torn out altogether. In this case, the door hinges need to be moved.
Stages of work:
- dismantling of old hinges;
- marking holes for new hinges;
- drilling holes;
- installation of furniture hinges.
Now the doors of the wall cabinets hang straight and shine with new hinges. But what to do with the holes for the old hinges? They must be carefully sealed with an acrylic-based putty.
On the construction market, you can find a whole range of such fillers, designed specifically to mask bumps and depressions in wooden surfaces. Since these compounds shrink, they need to be applied in 3-4 layers and then level the surface of the putty with sandpaper. The final stage of masking the old grooves under the hinges is the application of varnish or paint (the choice depends on the color of the furniture). You can read about design ideas for the kitchen in this material.
An equally common type of breakdown of kitchen fittings is the failure of guides in drawers. If the original assembly had roller guides, it is better to replace them with ball guides. The replacement technology is simple: fasteners are untwisted, old guides are removed and new ones are installed.
Replacing handles can already bring new notes to the appearance of the kitchen facade. But they will look aesthetically pleasing only if the entire set of handles is replaced, so it is important to choose the same ones for all cabinets and drawers.
When choosing handles, show your imagination, choose a design that is different from the previous one. At the same time, it is worth remembering the compatibility of materials: for example, plastic furniture handles will look inappropriate on a fiberboard facade, and metal ones will be trite. Handles made of combined materials look spectacular, for example, metal with wooden or glass inserts. You can read about the kitchen in art style in this article.
facades
At home, the following types of restoration of kitchen facades are available without the use of paints and varnishes:
- gluing a vinyl film;
- pasting with a cloth or oilcloth (decoupage);
- molding.
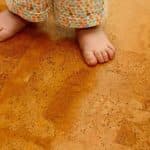
Do you know about the benefits of cork flooring for underfloor heating?
Wrapping with vinyl film
This type of furniture redesign is cardinal (you can completely change the color and pattern), but it does not hit the pocket.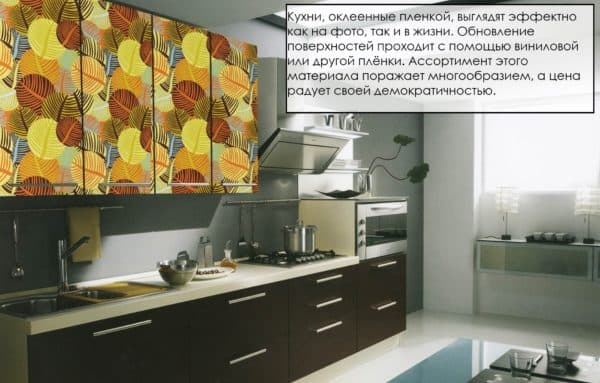
The range of self-adhesive films is huge, there are plenty to choose from.
When buying a self-adhesive, first of all, pay attention to the quality of printing – the pattern should be even, without color differences along the entire length of the material.
The self-adhesive film can be smooth and textured, imitating various materials: the surface of marble, wood, fabric, etc. The average service life of such a film is 3-4 years. The convenience of self-adhesive film as a material for redesign is that a damaged or torn-off area is easy to replace.
An interesting solution is the restoration of the kitchen facade with a film in two color variations: the upper part of the floor cabinet in light colors, the lower part in dark colors, or vice versa.
Working mechanism:
- Height and width measurements of cabinets and drawers. For the convenience of measurements, there is a grid with a 1X1 cm square on the back of the vinyl film. All the necessary parameters should be marked only on the back! In places where the film is bent, an allowance of 20 mm is left.
- Open the films. The vinyl film is cut with sharp construction scissors, with an indent of 2-3 mm from the contour line.
- Preparation of pasted parts of the facade. The handles are unscrewed, the surface of the panels is cleaned, degreased and left to dry completely.
- The film is glued from top to bottom, the back, the paper layer is removed gradually. It is important to ensure that there are no air bubbles between the film and the surface of the furniture: they are very difficult to remove when the part is already pasted.
- Smoothing the surface of the film with a rubber roller.
- Screwing the fittings into place.
It is difficult to carefully stick the film on weight, so it is better to unscrew the facade elements and place them on the floor for measurements and pasting. It will take longer, but the work will be done more carefully.
Decoupage
The decor of furniture facades with dense fabric is a distinctive element of the fashionable Provence style. You can imitate Provencal design using an equally fashionable decor method – decoupage.
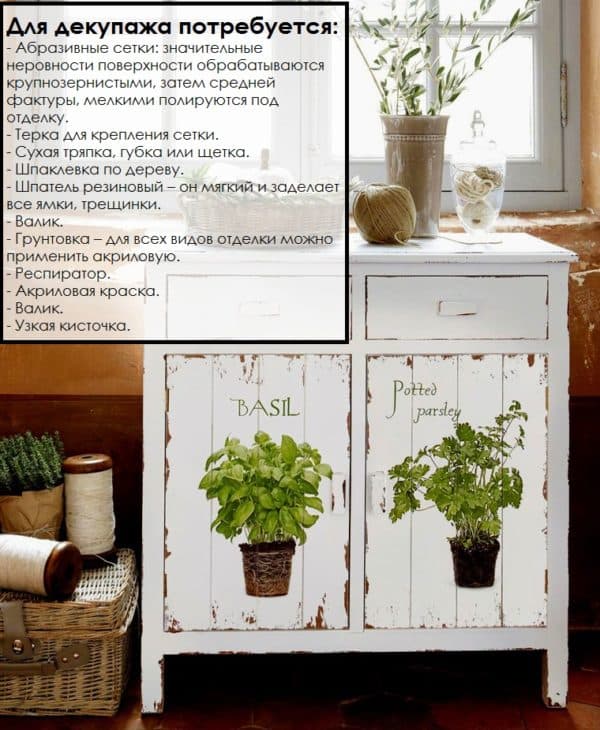
The choice of decoupage material depends entirely on your personal preferences. Decoupage elements in ethno-style look original and appropriate in the decor of the kitchen in light colors – ornaments “Petrikovskaya painting” or “Gzhel”.
Decoupage steps:
- Surface cleaning. In order for the fabric to lie on the surface of the facade evenly, without wrinkles and creases, it is necessary to get rid of pores or microcracks, if any, using the same wood putty. After the putty dries, the entire surface on which the fabric will be glued must be treated with fine-grained sandpaper.
- Bonding the fabric to the prepared surface. For this, ordinary PVA glue is suitable.
- Covering the decoupage surface with acrylic varnish. Varnishing is carried out in 3-4 layers, the next layer is applied only after the previous one has dried. It is most convenient to use a brush with a long, but narrow brush.
The fabric can be pasted over not only wooden but also plastic or glass surfaces of the kitchen set. It is not necessary to clean them, it is enough just to thoroughly degrease the place where the fabric will be glued.
The material for decoupage can be not only fabric, but also an ordinary oilcloth on the table with a pattern you like.
Another interesting option for restoring kitchen furniture with fabric is decorating hanging cabinets with fabric from the inside. It will give new life even to ancient cabinets that do not have doors. The fabric is stretched over the corners of the cabinet and fixed with nails and screws. Dishes and kitchen utensils look much more interesting against the background of stretched plain or patterned fabric than against the background of a bare board.
Decoration molding (pasting)
Molding is another type of affordable decor for kitchen set panels. It is an overhead element made of wood or plastic, which is attached to the facade with wood glue. Classic molding is available in the form of wooden planks that are cut to the desired length and with which you can form decorative elements to your liking. But you can also purchase a decorative molding that imitates stucco or carved elements. We can say with confidence that if you have such a set, you can read about how to choose the wallpaper for a classic kitchen in this article.
The combination of molding with other types of restoration, for example, repainting, can completely update the appearance of a kitchen set.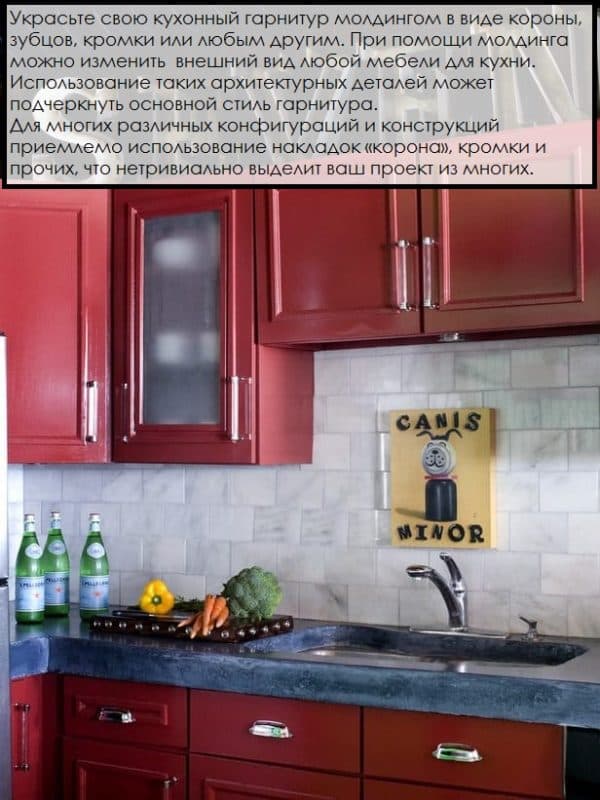
Processing of furniture with paints and varnishes
Restoration of kitchen furniture using paintwork materials provides for the following types of work:
- staining
- varnishing;
- stain processing.
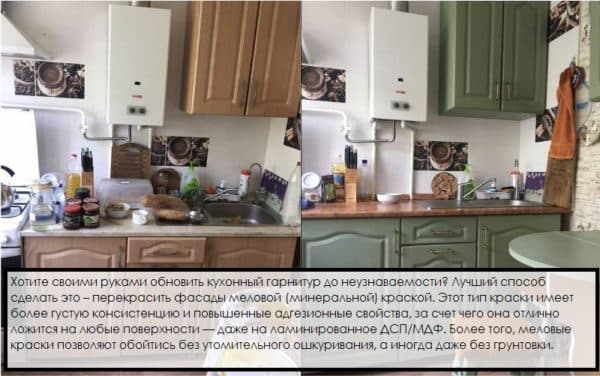
Painting in a contrasting previous color will radically update the look of the entire kitchen space. The most suitable coloring agent is car enamel, which is resistant to aggressive environments (high temperatures, high acidity, etc.)
Coloring
- Disassembly of the facade. At this stage, the headset elements to be painted are removed, all handles are unscrewed and the glasses are removed. Areas that are not planned to be painted must be sealed with mounting tape (you can also glue the glass with it if they cannot be removed). If the surface of the facade is covered with MDF film, it must be completely removed. For this purpose, a building hair dryer is used.
- Sanding the surface with sandpaper. It is convenient to use a construction grater.
- Coating the surface to be painted with a primer for wood. The composition is applied in two layers.
- Direct staining. Here you can use a different tool: brush, roller, spray gun. It all depends on the skills of the master. If the hand in the finishing area is not stuffed enough, it is easier to use a roller.
If the usual coloring does not impress you, try adding zest to it with the help of the glitz. It is a translucent paint with a thick texture. Glial is applied to the prepared (cleaned and primed) surface in a thick layer. Further, patterns are formed on the paint that has not yet dried with the help of a sponge moistened with water. An unsuccessful line of curl can always be removed by running a roller over the work surface. You can learn more about ceramic tiles for backsplashes here.

Lacquering and stain treatment
Opening with varnish will help restore the presentation of kitchen sets made of natural wood. Choosing a clear varnish will update the natural color of the wood, and if you use a varnish with a pigment, you can change its shade. Read more about built-in kitchen appliances here.
It is better to open facade elements with varnish in non-residential premises – a dry coating is very toxic.
Stages of work:
- Preparation of varnished surfaces. Just like when painting, fittings are removed from the facade elements, glass inserts are sealed with adhesive tape;
- Removing the old layer of varnish. To do this, use fine-grained sandpaper. The surface of the wood is sanded until the remnants of the old coating are completely removed. Wood-chemical dust arising in the process can be easily removed with a vacuum cleaner. After dust removal, the surface is carefully wiped with a damp flannel or sponge and thoroughly dried.
- Applying a primer. We make sure that the primer composition is evenly distributed over the surface to be treated. Let the primer dry completely.
- Lacquering in several layers with a brush. To maximize the natural beauty of wood, we make each top layer thinner than the bottom one.
Mahogany furniture can be updated by covering the elements of the facade with three to four layers of stain. This will give it a solid retro look. The stain is applied in the same way as varnish, on a previously cleaned and sanded surface.
How to update kitchen furniture
Restoration of the facade of a kitchen set is an interesting idea and only part of the resuscitation of its beautiful appearance. But it is quite realistic to restore other elements of the headset with your own hands: tables and chairs, countertops.
DIY repair chairs
Types of work that can be done at home include:
- updating varnishing;
- seat stretch.
How to apply paintwork is described above – the mechanism for varnishing chair parts is no different from working with facade elements. Consider how the seat upholstery is replaced:
- The seat is dismantled, the old fabric and upholstery are removed. Try not to damage the wooden base – it will still serve.
- A pattern for the future seat is made of thick cardboard. Lay the plywood base on the cardboard and circle it with a pencil, taking into account 3 cm for allowances.
- Using a template, cut out a blank for a new seat from foam rubber or batting. Next, using the same pattern, we cut out the fabric base of the new seat. On each side, you need to leave at least 12 cm for the hem. If the fabric is not plain, it is important to monitor the location of the pattern or ornament on it. The image should be strictly in the center of the fabric base.
- Glue the foam blank to the plywood base using regular superglue.
- The fabric is fastened with a staple gun or a construction gun. First, a fabric blank is spread face down on a flat surface, then plywood is applied to it, the side to which the foam rubber was attached should be at the bottom. Stretch the fabric around the entire perimeter or circumference of the chair and secure with staples. Try not to have large folds between the staples.
If the old upholstery of the chair has not leaked and still retains its density, you can stretch the fabric directly over it. In the same way, you can restore a worn sofa.
Countertop in the kitchen
The countertop is one of the most vulnerable places of the kitchen set because it is located in the working area. That is why the countertop made of chipboard or other materials loses its presentable appearance before the rest of the furniture elements. There are several ways to the simple and not very expensive restoration of countertops:
- staining;
- varnishing;
- decoupage;
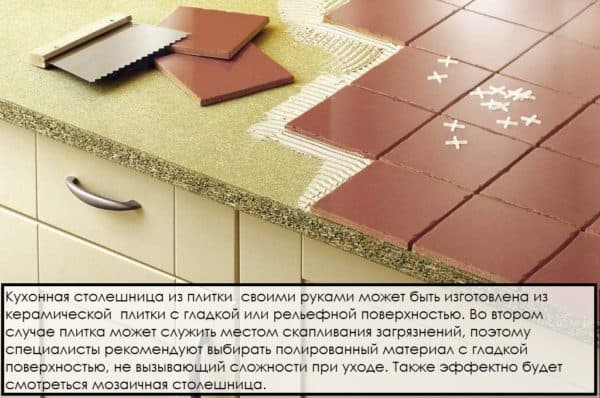
- ceramic tiling.
The first three methods have already been described above. Tiling involves gluing to the surface of the tile (it is better if it repeats the finish of the kitchen backsplash in color and texture) using tile adhesive. The final stage of laying – grouting. You can read about the decoration of the walls in the kitchen by clicking on this link.
Tile adhesive dries very quickly, so do not smear the entire surface of the countertop with it at once. Apply glue to the new area after you lay the tile over the previous one. You can choose the original skirting boards for the countertop. With this method, you can create a wooden tabletop.
Kitchen table
The tabletop, as well as the kitchen worktop of the work area, loses its presentable appearance before the rest of the headset elements. Various restoration methods are suitable for updating it, the schemes of which were described above:
- for tables made of natural wood – painting and varnishing;
- for tables made of fiberboard – painting, varnishing, pasting with a vinyl film, decoupage, gluing tiles.
And finally, another master class on how to restore kitchen furniture:
A comprehensive restoration of a kitchen set, from replacing (changing) fittings to reupholstering chair seats, will cost several times cheaper than purchasing a new set. If you make repairs with your own hands, the design will be unique.